
Prep steps that transform loose, gappy parquet into a flat base
If you love the soft, modern calm of a flat sheen underfoot, you’re in good company. Parquet looks spectacular when the light is diffused rather than bouncing off the blocks—but getting that look can go wrong if you rush the prep, skimp on sanding, or choose the wrong finish. This guide walks you through a professional, fuss-free process so you can achieve a Matt-looking parquet floor and keep it that way.

What “matt” really means (and why it’s kinder to parquet)
A matt finish doesn’t simply mean “not shiny”. In wood finishing, sheen is measured on a gloss unit scale (GU). “Matt” typically sits under ~10 GU; “extra matt” or “ultra matt” even lower. On parquet, this matters because the pattern already gives you texture and visual interest. A low sheen:
- Softens reflections, making small dents and micro-scratches far less obvious.
- Modernises period floors without stripping their character.
- Creates a gallery-like calm that works with both pale Scandi schemes and darker, heritage interiors.
In short: the right matt system flatters the geometry of herringbone, chevron and mosaic designs, and is more forgiving day-to-day.
Know your parquet before you begin
Every good finish starts with a quick diagnosis:
- Timber species: Most UK parquet is oak, but you’ll also find merbau, teak, beech and maple in older homes and schools. Oak is forgiving; beech and maple are blotch-prone; tropical timbers can be oily.
- Era and adhesive: Mid-century parquet may be bedded in bitumen; newer blocks are usually glued with modern adhesives. Bitumen needs careful management during sanding and repairs.
- Movement and moisture: Loose blocks, hollow sounds, cupping or crowning? Fix these first. Aim for stable room conditions (ideally ~18–22°C; relative humidity ~40–60%).
- Existing coatings: Old waxes and polishes, especially silicone-based sprays, can sabotage adhesion. Contamination must be removed fully, not just scuffed.
Taking twenty minutes to check these points will save you hours of rework later.

The common pitfalls (a.k.a. “the drama”)—and how to avoid them
- Patchy sheen after coating: Usually uneven sanding or inconsistent film build.
- Haloes around the room edge: Edger “dish-outs” that catch the light.
- Visible swirl marks: From overly aggressive grit or skipping grits.
- Lap lines and stop marks: Coating across strong daylight without maintaining a wet edge.
- Tannin pull or colour shift: Oak reacting to water-based products or certain primers.
- White lines at block edges: Movement, poor gap filling, or coating bridging gaps and cracking later.
- Contamination fisheyes: Silicone furniture polish residues causing craters.
Good news: all of these are preventable with the right sequence and technique, below.
The drama-free sequence: from repairs to final coat
Think of this as your roadmap to a Matt-looking parquet floor. Follow the order and don’t skip steps.
1) Repairs and stabilisation
- Re-bed loose blocks: Clean old bitumen or adhesive from both substrate and block. Use a high-quality parquet adhesive compatible with your subfloor (concrete or timber).
- Deal with hollows: Tap-test the surface; re-adhere where needed.
- Gap strategy: On parquet, resin filler made from fine sanding dust and a binders works well for hairline joints; avoid huge, rigid fills where seasonal movement is likely.
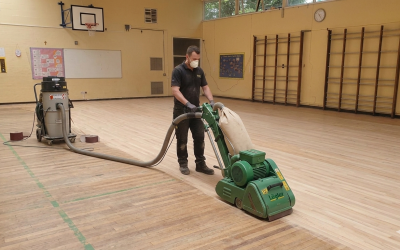
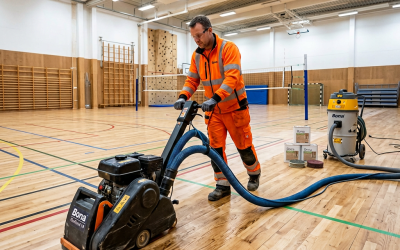
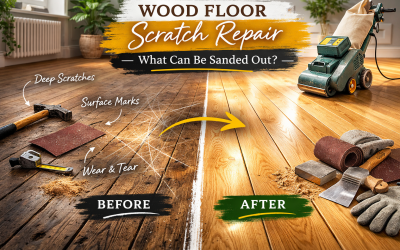
2) Professional-style sanding sequence
Parquet isn’t sanded in straight lines like floorboards; you work across the grain patterns to keep things flat.
- Initial cut: 36–40 grit at 7–15° diagonally to the pattern to level the field.
- Intermediate: 60 grit in the opposite diagonal to remove the previous scratches.
- Refine: 80 grit with the pattern to tidy the scratch pattern.
- Edges and corners: Match your edge grits to the field; use a detail/triangle sander for corners to avoid dish-outs.
- Final smoothing: Screen or mesh at 100–120 grit (150 if your system recommends it) using a multi-disc or buffer for a uniform, swirl-free surface.
Vacuum thoroughly between each stage. Dust left behind will telegraph through a matt finish as nibs and dots.
3) Optional colour work (keep it subtle)
If you’re chasing a raw, pale look, consider a neutral primer/“raw wood” system or a very light pre-tone. If you stain, do test boards first—parquet geometry shows lap lines easily. Apply evenly, wipe back consistently, and allow full dry time before topcoating.
4) The right primer
A compatible primer seals the timber, limits side-bonding risk, and sets the tone for matt topcoats. On oak, a tannin-blocking or neutral-tone primer helps avoid yellowing. Oily exotics may need a specific adhesion primer.

Choosing a matt system that actually stays matt
There are three main routes to a durable, low-sheen result. Your choice depends on usage, maintenance appetite, and the “feel” you prefer underfoot.
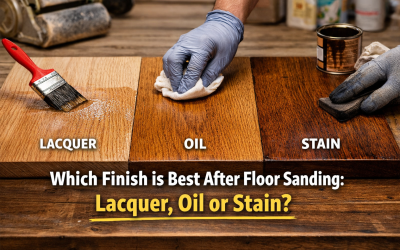
A) Water-borne matt lacquer (1K or 2K)
Best for: Busy households, rentals, commercial spaces.
Why: Excellent surface protection and low maintenance. Two-component (2K) versions add chemical and scratch resistance.
How: Typically one primer + two topcoats, de-nibbing lightly between coats with 150–180 mesh. Matt lacquers are formulated to cure to a flat sheen without looking “milky” if applied at the correct spread rate.
Watchouts: Over-rolling or starving the film makes patchiness more obvious. Follow the manufacturer’s coverage numbers.
B) Hardwax oil or oil-hybrid in matt
Best for: Homeowners who love a natural, hand-rubbed look and don’t mind periodic maintenance.
Why: Beautiful, tactile, easy to spot-repair.
How: Very thin coats buffed in with a white pad; remove all excess. Two light coats usually beat one heavy coat.
Watchouts: Early care is crucial—no wet mopping, protect from gritty shoes, and plan a maintenance oil within the first year in high-traffic areas.
C) “Raw” or “invisible” systems
Best for: The “bare wood” aesthetic.
Why: Clever chemistry keeps the timber looking unfinished while providing protection.
How: Usually a system primer plus matt topcoat designed as a pair.
Watchouts: Mixing brands can cause sheen drift or colour cast. Stick to the matched system.
Whichever route you choose, the outcome should be a long-lasting Matt-looking parquet floor that resists everyday wear without bright spots or dull patches.

Application technique: where matt is won (or lost)
Application errors show up more on low sheen because light can’t “hide” them. Here’s how to keep your Matt-looking parquet floor even and calm.
- Control the room: Close windows during coating to reduce drafts and premature edge-drying. Avoid direct sun on the floor. Ideal temperature is steady; huge swings cause lap lines.
- Edge plan: Cut in cleanly around skirtings in small sections, then roll the field and blend while both are wet.
- Maintain a wet edge: Work in lanes, feathering back into the previous pass. Don’t roll back over semi-dry areas.
- Right tools: For lacquers, use a microfibre roller (about 8–10 mm nap) or a T-bar on larger spaces. For oils, buff with a white pad and wipe off excess thoroughly.
- Film build: Respect coverage rates. Under-application risks shiny “telegraphing” of the wood; over-application can haze or streak.
- Between coats: Lightly de-nib, vacuum meticulously, and wipe with a lint-free microfibre (no tack-cloths containing wax or silicone).
- Cure times: “Dry to walk” is not “ready for rugs.” Lacquers often need 5–7 days to reach full hardness; oils may need 7–10. Use socks only for the first 24–48 hours; no furniture dragging, and no protective mats with rubber backings until fully cured.
Colour, tone and the “raw wood” look—without grey surprises
Parquet changes tone dramatically as you sand away old finishes. To keep a fresh, modern palette:
- Neutralise warmth (gently): A raw-wood primer or a tiny percentage of white in an oil can desaturate yellow tones without turning the floor chalky.
- Beware grey casts: Over-whitening on oak can look dusty, especially in evening light. Test under your actual room lighting.
- Consistency is king: On mixed-species mosaics, an ultra-transparent matt lacquer helps unify the look without heavy colourants that might take unevenly.

Gaps, edges and squeaks—taming movement in parquet
Parquet blocks expand and contract across multiple directions. Avoid brittle, thick gap fills in expansion areas; favour fine resin fills for hairlines and, where gaps are structural, re-bed the blocks. For squeaks on timber subfloors, stabilise from below if accessible, or inject compatible adhesive where appropriate. A stable base equals a finish that stays flat and quiet.

Cleaning and aftercare that keep the matt magic
A strong start is only half the story. To protect your Matt-looking parquet floor for years:
- Entry mats: A heavy-duty mat outside and a washable runner inside capture most grit.
- Pads on furniture: Felt pads on chair and table legs; replace as they compress.
- Routine cleaning: Vacuum with a soft brush head; damp-mop with a pH-neutral wood floor cleaner. Never steam.
- Refresh cycles:
- Lacquered floors: Use a manufacturer-approved matt refresher every 6–12 months in high-traffic areas; consider a light abrade and re-coat before you wear through the topcoat.
- Oiled floors: Plan a maintenance oil in the first year (or sooner in kitchens and hallways), then as traffic dictates.
Avoid silicone polishes; they cause slick patches and finishing failures if you ever re-coat.

A realistic timeline (and when not to rush)
- Day 1: Repairs, re-bedding, and rough sanding (36–60 grits).
- Day 2: Refine sanding (80–120), thorough vacuuming, and primer.
- Day 3: Topcoat 1 (morning), de-nib (late afternoon), Topcoat 2 (evening) if conditions allow.
- Cure: Light use after 24 hours, but keep things gentle for 5–7 days.
Big rooms, complex layouts, stains, or heavy repairs can add time. Rushing the dry window is the most common reason matt finishes go streaky.
Tools and materials checklist
- Professional-grade belt or multi-disc sander, edger, and detail sander
- Abrasives: 36/40, 60, 80, 100/120 (plus 150–180 mesh screens)
- Industrial vacuum with HEPA filtration
- Compatible parquet adhesive, resin filler binder
- Primer + matt topcoat system (or matt hardwax oil)
- Microfibre rollers/T-bar, trays and liners, extension pole
- White and beige pads for buffing
- Lint-free microfibres; pH-neutral cleaner
- Knee pads, good lighting, and patience

Troubleshooting quick fixes
- It’s slightly shinier near the windows: Likely over-worked or thin film—abrade lightly with 150 mesh and apply a controlled, even matt re-coat wall-to-wall.
- Tiny shiny dots appear after a week: Nibs or dust. A light screen and a final thin coat usually levels them out.
- White hairline cracks along joints: Movement or coating bridging gaps. Consider a re-sand of affected areas, re-fill, then re-coat with correct flexibility and film build.
- Patchy colour after staining: You may have missed a scratch pattern change. Re-sand to the last uniform grit, then re-stain carefully or switch to a neutral system.
DIY or professional? How to decide
DIY suits you if:
- You’re comfortable with power tools and dust control.
- The floor is sound, fairly flat, and not contaminated with unknown waxes.
- You can keep the space off-limits for curing.
Call in a specialist if:
- Blocks are loose across wide areas or the subfloor is suspect.
- You want a high-performance 2K system in a busy household or commercial setting.
- There are stains, water damage, or species you haven’t worked with before (beech, maple, oily exotics).
A professional team brings calibrated machines, dust extraction, and the muscle memory to avoid lap lines and dish-outs—precisely the gremlins that make matt finishes tricky.

The quiet luxury test
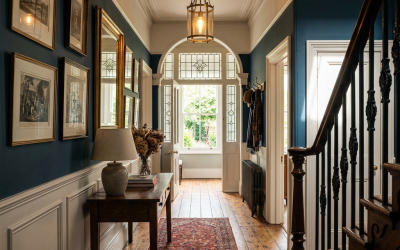
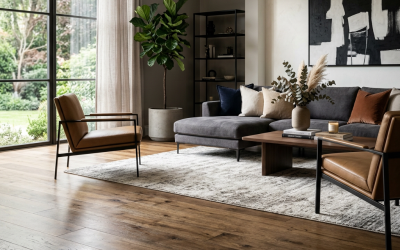
Stand back at dusk, when raking light is most unforgiving. A great matt parquet doesn’t shout; it just sits there—calm, even, tactile—letting the pattern do the talking. No shiny lanes, no edge haloes, no streaks. That’s the “quiet luxury” you’re after.
In summary
- Stabilise the parquet first: re-bed loose blocks and plan a sensible gap strategy.
- Sand in a parquet-friendly sequence, refine properly, and vacuum obsessively.
- Choose a matched system—matt lacquer, matt oil, or “raw” system—and stick to coverage rates.
- Control room conditions, maintain a wet edge, and let coats cure fully.
- Protect the finish with good habits and simple, regular care.
When you take these steps in order, you’ll enjoy the calm, contemporary look you wanted—without the hiccups.
Ready to enjoy the look—minus the stress?
If you’d like expert help delivering a flawless Matt-looking parquet floor, follow the sequence above or speak to a specialist for a tidy, on-schedule transformation. The right preparation, products and technique turn parquet from “project” into “pride of place”—and keep it beautifully matt for years.